Showing posts with label eyes. Show all posts

Sunday, 15 September 2013

Sleek Brow Kit Review


For a while now I've been using a dark brown eyeshadow to fill in my brows with an angled makeup brush. After about 2 years of this, I finally decided to invest in an eyebrow kit, I did buy one while I was in college from Fuschia Makeup but as my hair was pretty much black back then its become too dark for me now. 

I decided to try the Sleek Brow Kit in Dark (duuh). It comes with 2 products, a dark brown powder and a dark brown wax. The powder is used to fill in your brows and the wax to keep them in place. The kit also comes with 2 brushes (including an angled one) and a mini tweezers all for €9.50. I've used this a few times now so what did I think of it?


First of all, the packaging. I love the sleek (excuse the pun) black packaging. I do think its a lot bulkier than I expected but I guess that just means its quite sturdy and durable although I haven't dropped it (yet) so I can't comment on that aspect.


Now according to the general instructions I've heard you're supposed to apply the wax with the angled brush and then fill in your brows with the other brush with the powder. Nah nah nah this isn't how I do it.
I'd rather just stick to what I know. I prefer to apply the powder with my own angled brushes (I'm not a fan of the brushes that come in the kit, they're too small and finicky) and then apply a small amount of the wax with the small angled brush. 
I don't use much wax anyway as I dont have unruly brows so it works best for me to apply the wax last, it just seems odd to apply the wax and then put powder over it? I'm imagining the powder clumping in the wax and causing just pure grossness on the eyebrows haha.

As I mentioned above I don't like the brushes that came with the kit, the other brush (non angled) is odd. Its not like soft fluffy bristles, its got the kind of bristles you'd find on a foundation or concealor brush. 
The brushes are fine in a brow emergency but I prefer to use my own brushes.
The tweezers aren't much use either which I was disappointed about. They'd be handy for any of those stray hairs you spot in the car. They're far too stiff and so you can't grab any hair. Maybe its because they've been held together by an elastic band in the packaging and after a while, they'll loosen up but we'll see!


The powder isn't quite as dark as my usual powder but I'll get used to it. I imagine if you have darker hair than mine or black then these kits aren't for you, I do think they should introduce and extra dark kit. 

Anyway I do like this kit and will continue to use it!
If anyone wants a tutorial kind of post/video on how I fill in my eyebrows please let me know. Also I'm thinking of doing a how to grow your eyebrows post as mine were quite thin in December/January and have thickened up a lot! Let me know!

Emma xo


Wednesday, 11 September 2013

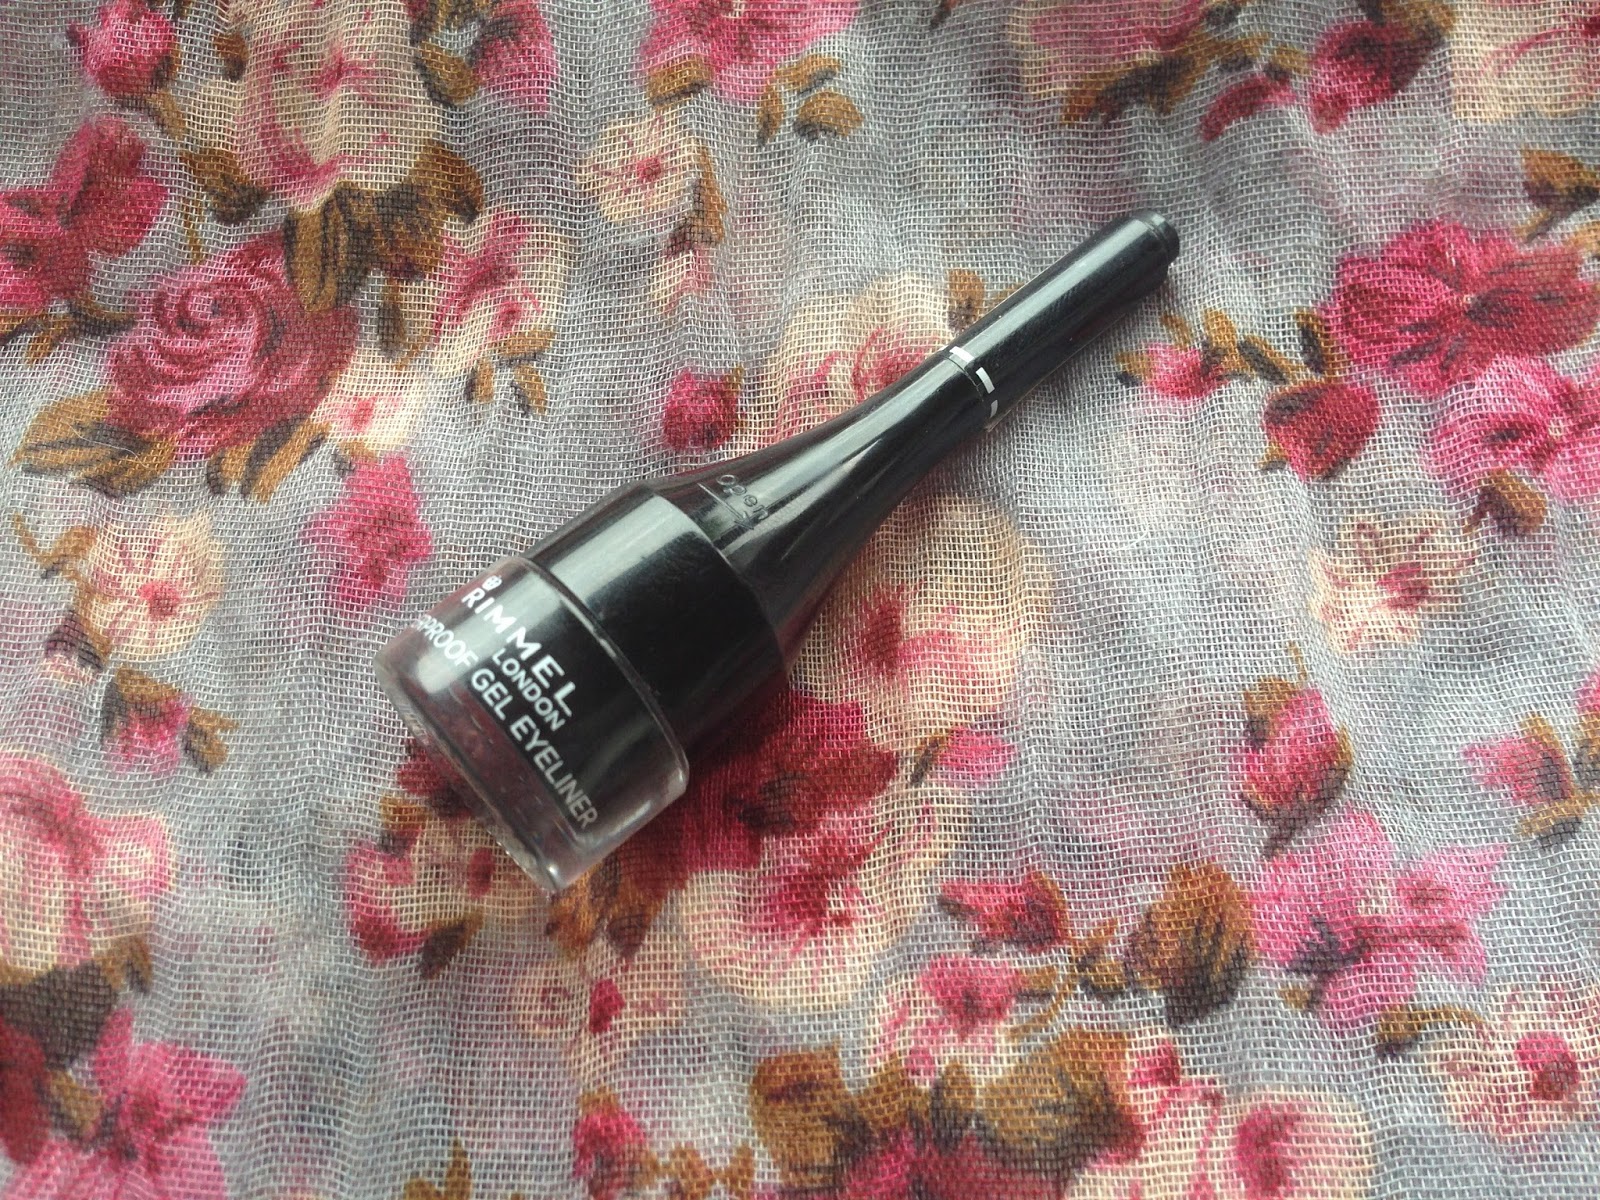
Rimmel Waterproof Gel Eyeliner


Most of you know I love my liner. I much prefer gel over liquid. I find liquid to be messy. 
For years I've been using the Essence gel liner and was devastated when it was discontinued, that loss started my hunt for a new liner. Starting with the Rimmel Waterproof Gel Liner.


*please excuse the fact the brush has been used. Bad blogger*

First off lets talk packaging. The product comes in a glass jar with a plastic oddly shaped lid. The top of the lid holds a brush. You pull the brush out, and you can attach it to the end of the lid to make a longer handle. Now, here's my problem, if you do attach it, the wide part of the lid gets in the way. If you choose not to attach it to the lid the brush is slightly too short.
I'd much prefer if it had a normal lid. I do like that a brush has been included but I wish it was separate. 


Application wise, it applies amazingly well. It glides on like a liquid with no pulling or tugging on your skin. There's no need to swirl or work the product around to soften before application. 
It does take a lot longer to dry than other gels though so you have to be careful for a few minutes after applying. It doesn't seem to last the whole day which I'm disappointed with. Especially since it claims to be waterproof. By the end of a busy work day it's faded and smudges if you touch it.
If the formula was longer lasting it would be perfect!
I'll continue to use it until I try a new one but whether I'll repurchase I'm not sure..
If any of you have any gel liner recommendations I'd really appreciate it!

Emma xo


Sunday, 31 March 2013

FOTD ft Urban Decay Naked Basics


Hey guys so a quick FOTD today, I am IN LOVE with the Urban Decay Naked Basics Palette. Todays post is a natural brown smokey eye. I will have a post up soon of a night time makeup look with the palette.

Foundation: MAC Studio Sculpt
Powder: Rimmel Stay Matte
Blush: Smashbox Blush Rush in Radiance
Eyeshadow: Urban Decay Naked Basics Palette
Eyeliner: Essence Gel Liner
Mascara: Tarte & Lancome Hypnose on top


Friday, 22 March 2013

eBay Individual Eyelashes Review/Photos


Hey guys so I'm not well at all today, I've got a bad case of tonsillitis (there was literally a tiny gap between my tonsils yesterday I thought I was going to suffocate), a cold and as a result of the two I've been feeling a bit nauseous too. All in all, not a fun time. So I decided since I've spent the day in bed watching Pretty Little Liars episodes that I should try and do something productive. So I thought I'd share my new favourite individual false eyelashes with you!

I'm not a huge false eyelash fan, my eyelashes are quite long anyway (I'd just like them to be a little thicker) so while strip eyelashes look good (and quite natural in some cases) on other people, they tend to look extremely fake on me. Also with the length of my eyelashes I find them a bit fiddly to apply. Also theres nothing worse than seeing photos of girls on nights out with the inner corner of their fake eyelashes coming unattached. So I decided to try individual lashes.
I've used them before in college and liked that you don't need to commit to a whole strip. So I thought I'd pop online to my favourite shop in the world, eBay, and have a browse for a few. 


Guess how much these cost me? 

Thursday, 21 March 2013

Tarte Prime Shine & Define Kit Review & Photos


Hey guys so being from Ireland I've never tried Tarte Cosmetics before, so I was soooo excited when I was emailed by Isabelle from Les Chateau Des Fleurs to tell me I'd won her Tarte giveaway!
I'll include photos of all the products ON me at the end of the post :)

''This 3-piece deluxe size essentials kit is just what you need for getting flawless on the fly. Perfect and brighten your complexion and dramatize your eyes with clean slate™ poreless 12-hour perfecting primer primer, Amazonian clay BB illuminating moisturizer and gifted™ Amazonian clay smart mascara. This convenient, travel-friendly kit covers all of your beauty basics as you prime, shine and define yourself.'' - TarteCosmetics.com

 Tarte Prime Shine & Define Kit* $12.00 here

The kit I'd won is called the Prime Shine & Define to go kit and contains 3 mini products. 
The Clean Slate Poreless Primer (7.5ml), the Amazonian Clay BB Cream (9ml) and the Amazonian Clay Smart Mascara (5ml).


I was quite worried when I saw this was a silicone-y primer as if you've read my blog for a while you'll know I've mentioned before that usually silicone based primers break me out in a rash due to my eczema but I was really surprised that this didn't seem to do that! I've used it about 4 times now and haven't noticed any redness, usually I'll notice it after the second time. Although I haven't been using this consecutively, only on special occasions as I don't want to waste it so maybe if I used it a few days in a row it might. 
As for the 12 hour perfecting claim I'm actually quite impressed. Usually on a night out I'll have to reapply my makeup or add more powder during the night but I didn't feel that was necessary when I was wearing this primer, I didn't notice any excess shine etc. You also only need to use a tiny amount as it applies really well.


The only 'BB' cream I've ever used was the Garnier one and that was atrociously orange so I've stayed away from them for a while but I was very excited to try this out. I tried it on its own and to be honest I didn't notice too much of a difference in my skin in comparison to using my Nivea tinted moisturiser. I also tried mixing it with my foundation on a night out as recommended on the website but didn't notice much of a difference either. Its a nice product and I'll continue using it until its all gone but personally I wouldn't go out and buy the full size, I just don't think its worth the price.


First off I have to say, I LOVE the packaging of this mascara, I think the wooden effect just looks so cute and different to other mascaras. When I used the mascara I noticed it felt quite dry and not very wet like other mascaras but it still distributed a good amount of product. I think the entrance (where you put the mascara back in the tube, I've no idea what its called haha) does a good job of removing excess mascara. I don't get ANY clumps at all no matter how many layers I use (and trust me I use A LOT). Its not amazing at volumising but I just use a more volumising mascara on top usually. I honestly think if we had Tarte here in Ireland I would buy a full size as it really is a good mascara and I enjoy using it! I'll be sad when its all gone!

Now, onto the products on my actual face!
In the photos below all I'm wearing besides the Primer, BB Cream and Mascara is a little bit of pencil eyeliner, powder and a blusher.


close up shots of the mascara

If you can get your hands on this kit I'd definitely recommend picking it up as its not expensive at all for the amount of product you get.
You can get the kit from TarteCosmetics.com here


Wednesday, 6 March 2013

International Sleek Eyeshadow Palette GIVEAWAY


**QUICK NOTE: With all the crazyiess and rumours about GFC being scrapped, make sure to follow via Bloglovin!**

Yes I'm finally doing my first giveaway! *happy dance*
I'm a firm believer that you can never have too many eyeshadow palettes, in fact I only have a few single eyeshadows, the rest of my collection consists of eyeshadow palettes!
So, I decided to giveaway a Sleek Eyeshadow Palette of your choice from Cloud10Beauty.com.


If you win: You choose a Sleek Eyeshadow Palette from Cloud10Beauty.com, I will give them your name and address, and have it shipped directly to YOU from Cloud10Beauty.

I was actually going to purchase the palette myself and have it shipped to you, but when I emailed Cloud10Beauty to enquire about shipping costs, Blanaid was so kind and offered to provide the palette for the giveaway! This means I will be able to accept international entries. YAY.

This giveaway will run for 1 month and as I mentioned above is open WORLDWIDE.
The only rule is you MUST be following my blog via GFC as this giveaway is for my amazing followers.
I would also really appreciate it if you'd give Cloud10Beauty a follow on twitter to say thank you for providing the prize!
The rest of the entries are optional although the more you complete the better chance you have of winning.

I'll be using Rafflecopter and WILL BE CHECKING ENTRIES. If you attempt to cheat I will delete your entries & you will be excluded from future giveaways. I do know that there can be some difficulties with Rafflecopter asking you to enter again when you go back to the post but don't worry I won't eliminate you if this happens.
This also applies to those who unfollow immediately after the giveaway, you will not be included in future giveaways.

If the winner does not email back after 48 hours, I will be choosing another winner. 

a Rafflecopter giveaway

If you are under 18 please more sure its ok with your parents that I can send you your prize if you win. 

If you have any questions you can email me at EmmaLFx@gmail.com
Good Luck!

Thursday, 21 February 2013

Lancome Hypose Mascara Review & Photos

I've always heard great things about Lancome's Hypnose Mascara, I was even recommended to try it by my neighbour but I was put off by the price tag! I'm very particular about mascaras and didn't want to spend around €27 on a mascara that I didn't like so when I received a sample of it as a prize I was delighted!


Lancome Hypnose Mascara* Full Size €27 here
                                                           £22 here


Now this is just the sample packaging, the actual mascara looks like this:

Sunday, 17 February 2013

Urban Decay Loose Pigment Eyeshadow in 'Goddess'

I'm usually not a fan of pigments as I think they can be messy and cause a lot of fallout (especially after an incident where I spilled half a pot of a dark grey/black pigment all over my white bedsheet) but a while ago I picked up this Urban Decay pigment in Goddess because I thought the colour was gorgeous and that it was 'jazz up' (I can't believe I'm using that word, I was going to say spruce up though so be thankful I didn't!) a smokey eye.

Urban Decay Pigment in Goddess €17.50

Thursday, 7 February 2013

GOSH Velvet Touch Eyeliner in Ocean Mist


This is probably the very first eyeliner I ever bought and I still have it (that's probably disgusting actually..)
I still love it.

Sunday, 3 February 2013

Essence Long Lasting Eye Pencil in C'est La Vie (05)


I love this eyeliner. Other than my black eyeliner this is the one I probably use most often. PLUS I don't just use it as a liner.

Wednesday, 30 January 2013

Essence Kajal Pencil in Cool Breeze (11)


One of my favourite brands for colourful makeup is Essence because I don't wear colourful makeup often I don't like to spend a fortune on it. 
With Essence, I don't feel guilty for not wearing it often as it was so cheap!
I bought this eyeliner aagggess ago because I loved the colour of it so much. 

Tuesday, 15 January 2013

Wednesday, 9 January 2013

Monthly Starsign Makeup Tag : Capricorn

Hi guys so I wanted to let you all know that I'm going to be taking part in a monthly makeup tag over on Fiona's blog La Belle Dame Sans Merci along with Sarah from Allure Cube.

This months star sign was Capricorn and we had to create a look inspired by it.
This is the look I came up with:


Because Capricorn is usually seen as half goat, half fish. I decided to go with a white (the goat) fading to a blue (the fish). The flicked liner was inspired by the horns of the goats.
The colours used in this look came from the Urban Decay Preen and Dangerous Palettes.

Make sure to check the other girls looks out here.
I love how we all had a different interpretation of Capricorn.

If YOU'D like to take part next month (you totally should btw) make sure to email Fiona at FionaIrish@eircom.net. 

Emma xo

Monday, 7 January 2013

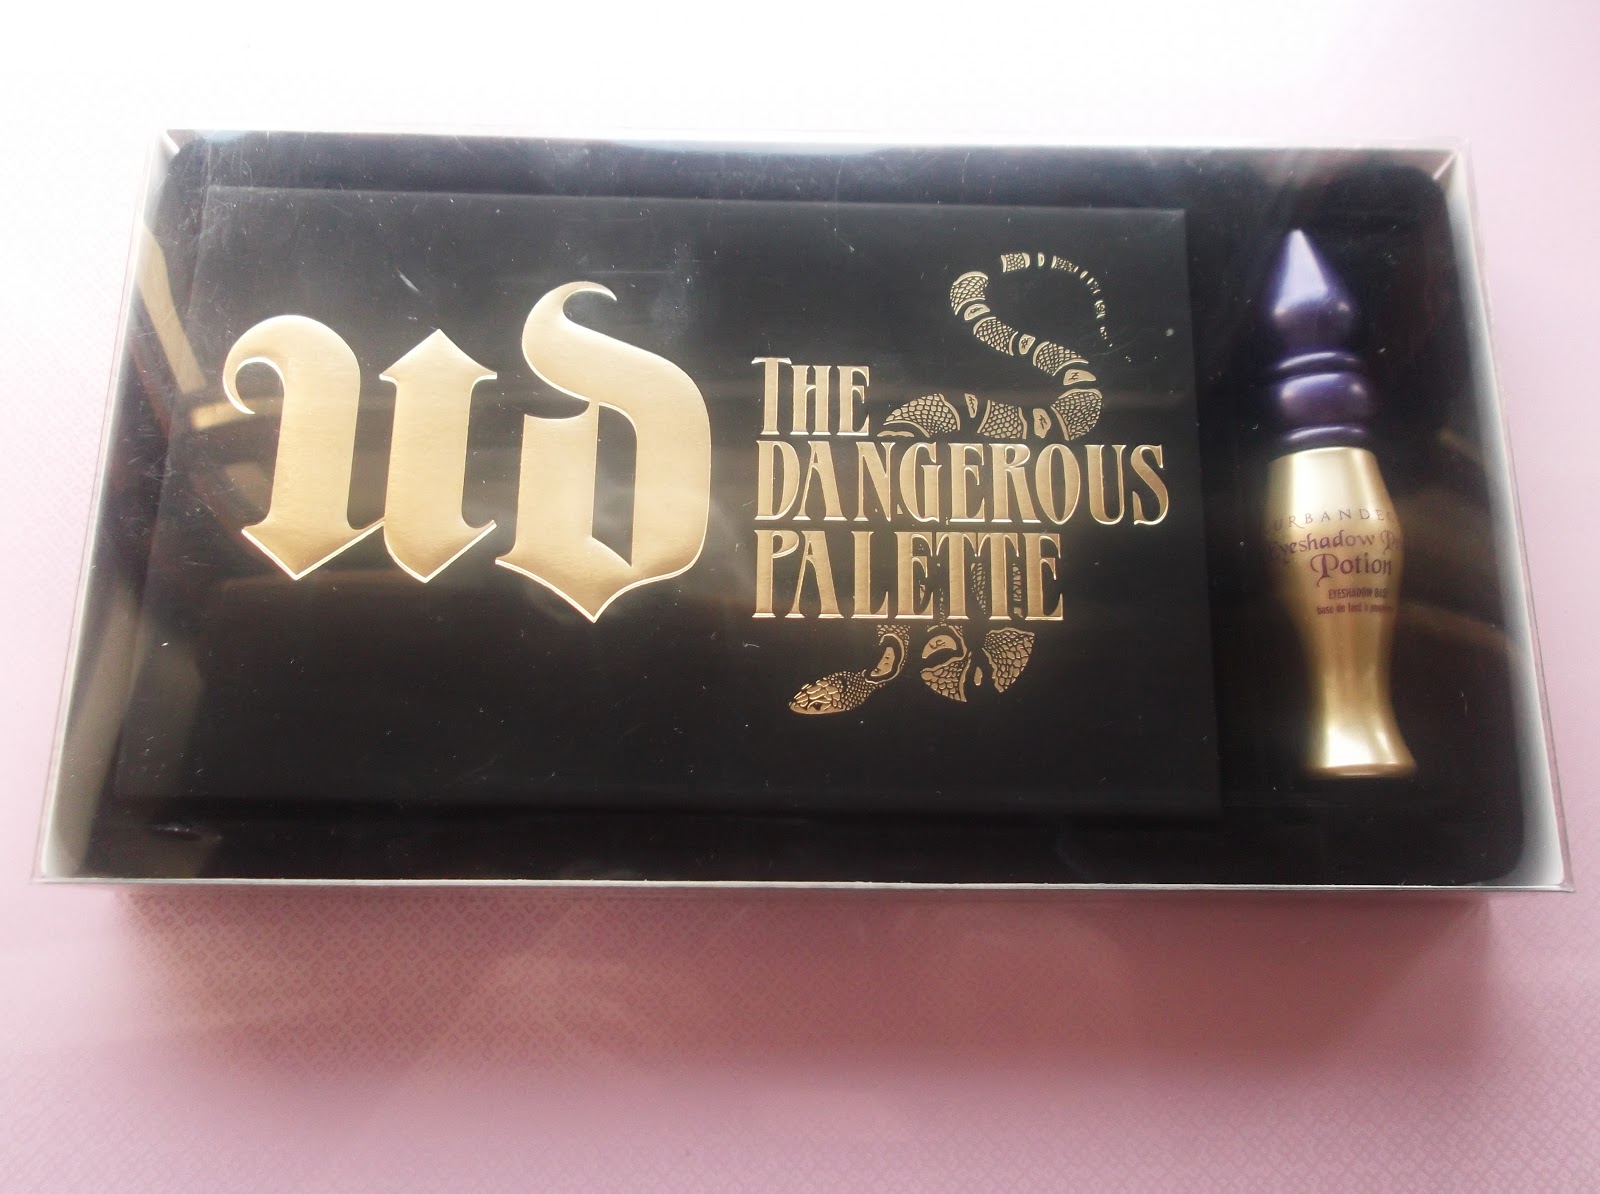
Urban Decay: The Dangerous Palette Swatches & Review

So as I mentioned in my previous post, I got the Feminine Palette from Urban Decay in my Christmas stocking. I was also lucky enough to get The Dangerous Palette also! (snaps for Mammy Pretty Things!)
I think these two are the only two palettes I'll be using for a while!

Urban Decay The Dangerous Palette

Saturday, 5 January 2013

Urban Decay: The Feminine Palette Swatches & Review

Urban Decay is probably my favourite brand for eyeshadows, not only are they amazing quality but the palettes are always gorgeous and such good value.
For Christmas, my momma was kind enough to include this beauty in my stocking. 
P.S check back on Monday to see what other palette was included in my stocking ;)
I already have the preen palette (review here) so I was delighted to add this baby to my new collection! That's right, I'm starting a UD Palette Collection.

I love these little palettes, they're gorgeous and very handy for traveling (not that I ever actually travel!)

Urban Decay Feminine Palette

Tuesday, 1 January 2013

NYE Makeup 2012

Hi guys, I hope you all had a great New Years Eve!
I just wanted to make a quick post showing you my NYE makeup!
If you follow me on Instagram (link in sidebar) you'll have already seen it but I thought I'd share it with those of you who don't follow me.
I think this makeup look is perfect for any event, not just NYE as its not too sparkly or glittery.