Sunday, 22 September 2013

A/W '13 Fashion Wishlist

1 | 2 | 3 | 4 | 5 | 6 | 7 | 8 | 9 |

Of course I had to include a heap of sweaters!
A/W is not the same without a onesie. Yes you look like a giant baby but who cares. They're fun. I really want this Stitch one! The eBay seller has tons of different animal type ones!
I am in love with these Nike runners! Of course I would pick the pink ones!
I've actually already bought the new look black wedges but decided to include them anyway because I love them so much!
I've always loved the look of these cuffs and only recently bought my first from eBay, now I'm lusting after this one!
And finally I had to include a scarf, A/W in Ireland is not complete without a scarf! I love the colour of this one from Boohoo.

I'm sure there are plenty more items I'd like for autumn/winter but these are the items I've saved to my WantWorthy account (seriously if you haven't tried this website its amazing).
Wantworthy is perfect for saving any items you spot on a website to go back and get later. Its really easy, you make an account, install the button on your toolbar (it tells you how to do this) then everytime you click on an item on a shopping site that you want, you simply press the WANT button on your toolbar and it saves the item to your wantworth account. When you log in the photos of all the items you want comes up and you can click on them to take you to the exact website page to buy them! Easy. 

So thats my A/W wishlist! If you have a post like this please share it in the comments because I'm sure I'll want half the stuff on yours too!

Emma xo

Wednesday, 18 September 2013

Garnier Moisture Match - Start Afresh Normal to Dry Skin Review


The only moisturiser I've ever used and felt made a difference to my skin was the Dermalogica Skin Smoothing Cream, eventually it ran out and I didn't fancy spending that amount again so I decided to see what the drugstore had to offer, deciding that if I didn't like anything I could always just repurchase my Dermalogica.
I decided to pick up the Garnier Moisture Match for 'Normal to Dry Skin' as it was on sale in Sam McCauleys Chemist.
I would have relatively dry skin but didn't want anything too thick for everyday use. 

There are 5 types to choose from
Goodbye Dry (dry to very dry skin)
Start Afresh (normal to dry skin)
Shine Be Gone (combination to oily skin)
Wake Me Up (dull skin)
Protect & Glow (normal skin)

So, what did I think of the Start Afresh moisturiser?


I actually really like the packaging. The size is perfect to fit into my makeup bag or handbag. I much prefer a squeezy tube over a tub as its more hygenic.


The texture is quite odd, its like a mixture between a gel and a cream. It looks and spreads like a cream on the skin but it feels cooling, refreshing and just amazing when applying it. It also soaks in really fast.
My skin feels instantly hydrated and when combined with regular exfoliation my skin stays super smooth. 
I really really like this moisturiser! 

I will more than likely be repurchasing this again as I really do love it! I might also pick up the one for 'Goodbye Dry' to use at night for extra hydration or maybe the 'Wake Me Up' for dull skin days. They're cheap enough to be able to afford two!

You can shop the entire range on boots.ie here for €7.99
or on SamMcCauley.com here for €8.99

Have you tried any of the moisture match moisturisers?

Emma xo


Sunday, 15 September 2013

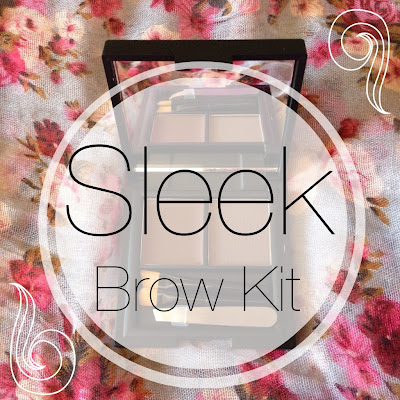
Sleek Brow Kit Review


For a while now I've been using a dark brown eyeshadow to fill in my brows with an angled makeup brush. After about 2 years of this, I finally decided to invest in an eyebrow kit, I did buy one while I was in college from Fuschia Makeup but as my hair was pretty much black back then its become too dark for me now. 

I decided to try the Sleek Brow Kit in Dark (duuh). It comes with 2 products, a dark brown powder and a dark brown wax. The powder is used to fill in your brows and the wax to keep them in place. The kit also comes with 2 brushes (including an angled one) and a mini tweezers all for €9.50. I've used this a few times now so what did I think of it?


First of all, the packaging. I love the sleek (excuse the pun) black packaging. I do think its a lot bulkier than I expected but I guess that just means its quite sturdy and durable although I haven't dropped it (yet) so I can't comment on that aspect.


Now according to the general instructions I've heard you're supposed to apply the wax with the angled brush and then fill in your brows with the other brush with the powder. Nah nah nah this isn't how I do it.
I'd rather just stick to what I know. I prefer to apply the powder with my own angled brushes (I'm not a fan of the brushes that come in the kit, they're too small and finicky) and then apply a small amount of the wax with the small angled brush. 
I don't use much wax anyway as I dont have unruly brows so it works best for me to apply the wax last, it just seems odd to apply the wax and then put powder over it? I'm imagining the powder clumping in the wax and causing just pure grossness on the eyebrows haha.

As I mentioned above I don't like the brushes that came with the kit, the other brush (non angled) is odd. Its not like soft fluffy bristles, its got the kind of bristles you'd find on a foundation or concealor brush. 
The brushes are fine in a brow emergency but I prefer to use my own brushes.
The tweezers aren't much use either which I was disappointed about. They'd be handy for any of those stray hairs you spot in the car. They're far too stiff and so you can't grab any hair. Maybe its because they've been held together by an elastic band in the packaging and after a while, they'll loosen up but we'll see!


The powder isn't quite as dark as my usual powder but I'll get used to it. I imagine if you have darker hair than mine or black then these kits aren't for you, I do think they should introduce and extra dark kit. 

Anyway I do like this kit and will continue to use it!
If anyone wants a tutorial kind of post/video on how I fill in my eyebrows please let me know. Also I'm thinking of doing a how to grow your eyebrows post as mine were quite thin in December/January and have thickened up a lot! Let me know!

Emma xo


Friday, 13 September 2013

Real Techniques Miracle Complexion Sponge Review - Beauty Blender Dupe???


For a while now I've considered buying the beauty blender but to be honest I couldn't bring myself to pay that much for a sponge.
So while browsing Cloud10Beauty website I spotted a HUGE ad on their homepage advertising the new Real Techniques Miracle Complexion Sponge, I didn't even know RT were coming out with a beauty blender dupe so of course I had to go have a gawk. When I spotted the price €5.99 I had to add it to my basket!


My packaging got a little bashed up in the post!


 The sponge itself is quite a unique shape compared to the Beauty Blender, it has a flat side which is great for getting under the eyes and the sides of the nose.

To use, you basically hold the sponge under water, you do have to hold it for about a minute for it to expand fully and then you squeeze the water out, I also placed it in a towel and squeezed to make sure it was just slightly damp, not wet.

Then I squirted my foundation onto the back of my hand, patted the sponge on top and started to work it onto my face. I bounced the sponge along my skin occasionally 'rubbing' along my hairline to blend. 

The result? HOLY CRAP I WILL NEVER USE A MAKEUP BRUSH AGAIN.
I find blending with a brush tends to drag the foundation along my skin, leaving streaks and basically removing the makeup from my skin, I've used a buffing brush also (the sigma one) and found stippling left little dots on my makeup from the tips of the bristles. This sponge just leaves a perfect, flawless application.

I've only used it once (last night) and didn't have time to take a photo of my makeup afterwards (I was rushing out to dinner with a friend) but keep an eye out for any future makeup looks/face of the days as this sponge will definitely be used in them!

Have any of you tried either this sponge or the beauty blender? 
Are you pro makeup brushes or pro sponges?

Emma xo


Wednesday, 11 September 2013

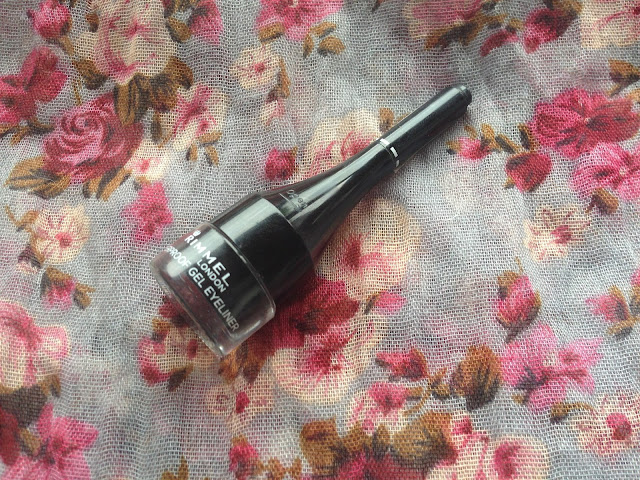
Rimmel Waterproof Gel Eyeliner


Most of you know I love my liner. I much prefer gel over liquid. I find liquid to be messy. 
For years I've been using the Essence gel liner and was devastated when it was discontinued, that loss started my hunt for a new liner. Starting with the Rimmel Waterproof Gel Liner.


*please excuse the fact the brush has been used. Bad blogger*

First off lets talk packaging. The product comes in a glass jar with a plastic oddly shaped lid. The top of the lid holds a brush. You pull the brush out, and you can attach it to the end of the lid to make a longer handle. Now, here's my problem, if you do attach it, the wide part of the lid gets in the way. If you choose not to attach it to the lid the brush is slightly too short.
I'd much prefer if it had a normal lid. I do like that a brush has been included but I wish it was separate. 


Application wise, it applies amazingly well. It glides on like a liquid with no pulling or tugging on your skin. There's no need to swirl or work the product around to soften before application. 
It does take a lot longer to dry than other gels though so you have to be careful for a few minutes after applying. It doesn't seem to last the whole day which I'm disappointed with. Especially since it claims to be waterproof. By the end of a busy work day it's faded and smudges if you touch it.
If the formula was longer lasting it would be perfect!
I'll continue to use it until I try a new one but whether I'll repurchase I'm not sure..
If any of you have any gel liner recommendations I'd really appreciate it!

Emma xo


Monday, 9 September 2013

Revlon Lip Butter Wild Watermelon*


A while ago I reviewed my very first Revlon Lip Butter, In that post I mentioned I wanted to try some of the other colours, someone in the comments mentioned Wild Watermelon. I'd been meaning to pick it up so when my friend gave me a few beauty related goodies for my birthday I was delighted to see the Revlon Lip Butter in Wild Watermelon* was included.
I am OBSESSED. Seriously oh my freakin god I love these things!
I have such dry lips so a lot of lipsticks end up going flaky looking on me.

Saturday, 7 September 2013

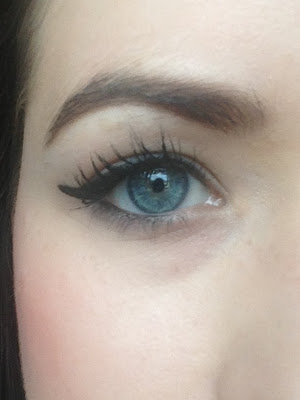
On My Face: Brown Metallic Smokey Eye


Hello on the rare occasion that I decided to wear eyeshadow I thought I'd snap a few photos to share with you all. The first two were taken before I straightened my hair and the second two afterwards, both were taken in the same spot. It weird how much the lighting changed in the space of about 30 mins!
If you want a tutorial on this look I could probably do it just let me know.

Emma xo


Thursday, 5 September 2013

Betty Crocker Chocolate Chip Cookie Mix : The Easiest Cookies Ever


Hi everyone so todays post is going to be a little different than usual. I'd love to do more baking/cooking posts but lets be honest, even though I love the thought of baking, I can't be bothered with all the messiness of mixing flour and eggs and all that malarky. 
So, when my Mam brought home this Betty Crocker cookie kit (she knows I like baking but I'm basically too lazy to haha) I was excited to try it..well actually I was excited to eat them!


Yes thats right you only need 3 ingredients. Vegetable Oil, Waer and an Egg. All of these are things you would usually have at home so you really dont need to buy anything else other than this little kit.


It all comes in a bag. You pour the mix into a bowl and add the extra ingredients.


You can mix it with a spoon but it started to get annoying so I just used my hands. Its so much faster.
Once it formed a dough I just took a few small balls of it, placed it on the baking tray and flattened them out. Now I made the mistake of making these raw cookies normal cookie size and by the time they cooked they expanded. I'd recommend making them smaller than you want them to be.
Then you pop them in the oven and wait 10 minutes.


Seriously these are so freakin good. They didnt last very long on the kitchen counter.. mainly because I ate A LOT of them. I feel guilty (I don't really).

I think these are handy to keep in the cupboard for quick baking. Whip em up super fast before heading to a friends for tea, hey you could even be naughty and say they're homemade. Technically you did make them at home ;)

Emma xo


Tuesday, 3 September 2013

I Had Surgery! i.e Why I Haven't Been Posting

Hi guys I'm just writing a quick post from my iPhone blogger app to explain why I haven't been posting, after my last update post I had planned so many beauty, fashion and lifestyle posts but then I received another out of the blue appointment to have my tonsils removed. In the last post I explained how my previous appointment had been cancelled.
I've been in a lot of pain and discomfort the last few days and I'm beginning what's considered 'the worst' few days pain wise (when the scabs start to come off).
Tonsillectomies in adults are a lot different recovery wise than in kids. While most kids bounce back quite fast, it takes a lot longer for adults to recover as the tonsils are generally a lot larger and more deep rooted. 
To be honest I'm getting sick of the recovery at this stage and just want to be better. Most days I just want to sleep all day so I don't have to deal with the pain and sickness. Maybe once I'm feeling better I can do a post detailing my experience and any helpful tips I've come to realise for anyone else who is considering or expecting to have the surgery. Please let me know if this would be helpful.

You can follow me on twitter if you want to keep updated with how I'm feeling and when I'll be back posting. My username is @efxoemma. 

Emma xo